
Mint is one of the most popular Ubuntu-based distributions, mainly due to its easy-to-use interface. Apart from that. Mint’s ability to run smoothly even on older machines is truly amazing. Another good thing about Mint is that the download page allows you to choose between three desktop environments, Cinnamon, MATE, and Xfce, with Cinnamon being the most popular.
Mint is a great distro for people who want to try out Linux and are unsure where to start. If you own an ancient PC that can hardly run Windows, install Mint on it and see the magic. In this article, let’s look at how to install Linux Mint easily. Additionally, we’ll also be looking at how you can dual-boot it alongside Windows.
Warning! This method requires fiddling with your computer’s hard drive, which we don’t recommend doing unless you know what you’re doing. Please make sure to take a backup of your files before proceeding.
Prerequisites for Linux Mint dual boot with Windows
- An 8GB or above Flash drive
- Free storage space on your computer (at least 100GB)
- Patience
Making a Bootable USB Drive Using Rufus
To flash the distribution and boot into it, you’ll first need to make a bootable USB Drive. There are a lot of software that can make bootable USB drives, but the one we’ll use in this tutorial is Rufus, which you can download here.
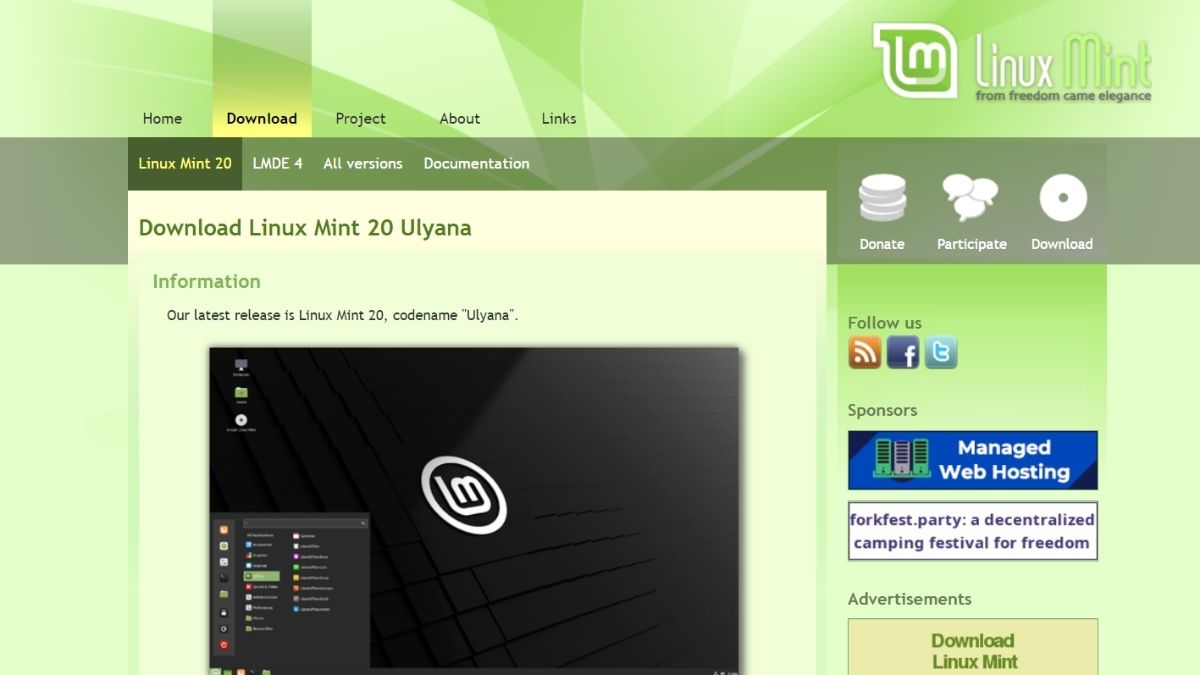
1. Download Linux Mint from here and save the iso on your Desktop.
2. Insert your flash drive into the USB port and fire up Rufus.
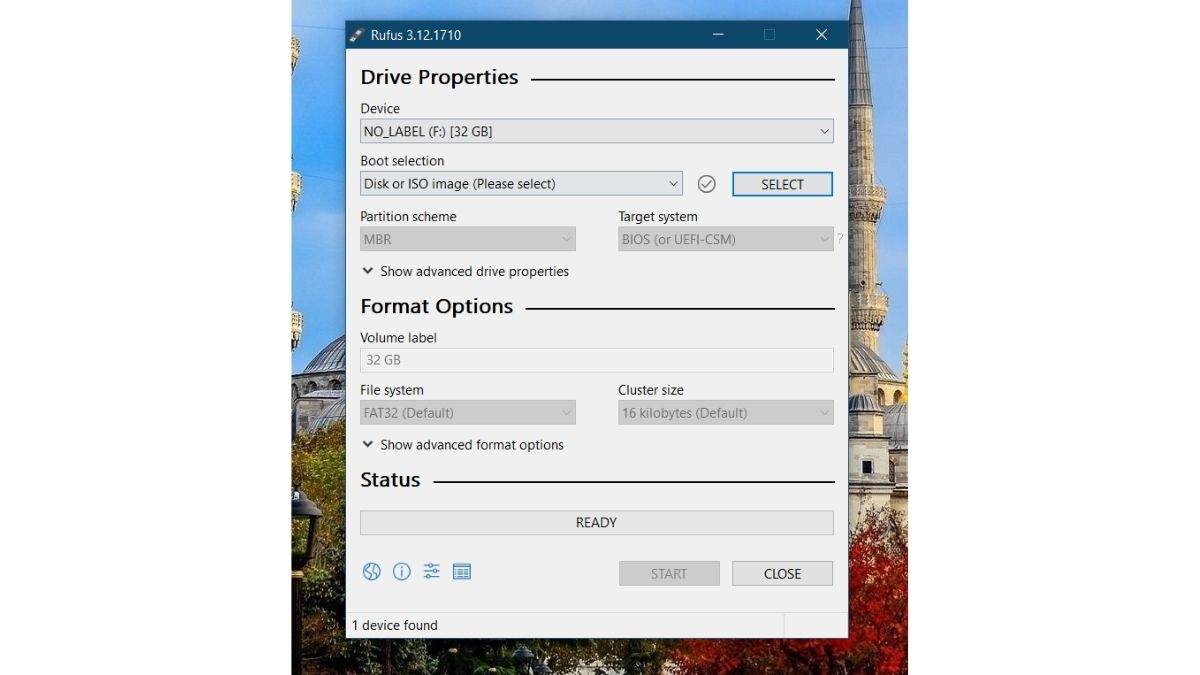
3. Your flash drive will be automatically detected by Rufus. Click on the Select button
4. Browse your desktop and select the ISO. Now, Click on start.
5. Allow Rufus to download Syslinux if prompted and wait for the flashing process to complete.
Creating a Partition for Linux Mint
1. Search for “partitions” in the Start menu’s search bar and click on the first option (Create and Format Hard disk Partitions).
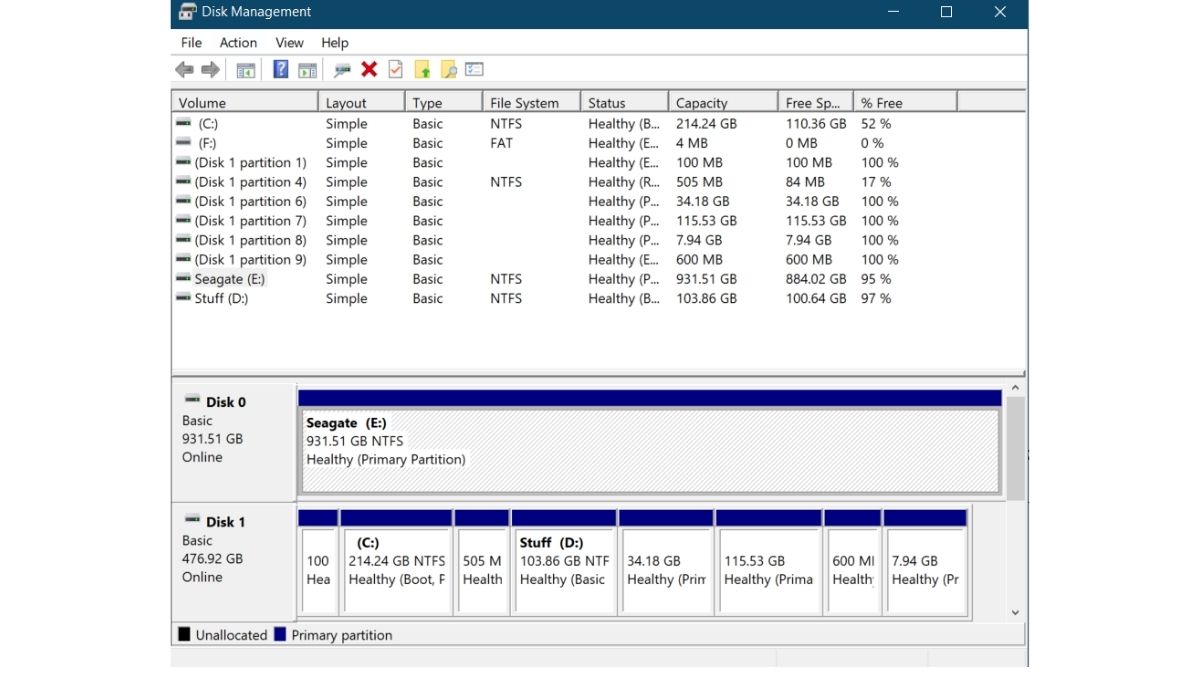
2. All the partitions and drives on your computer will be displayed. As my laptop has both SSD and HDD, this window might look different on your computer. I’ll be installing Mint on the HDD.
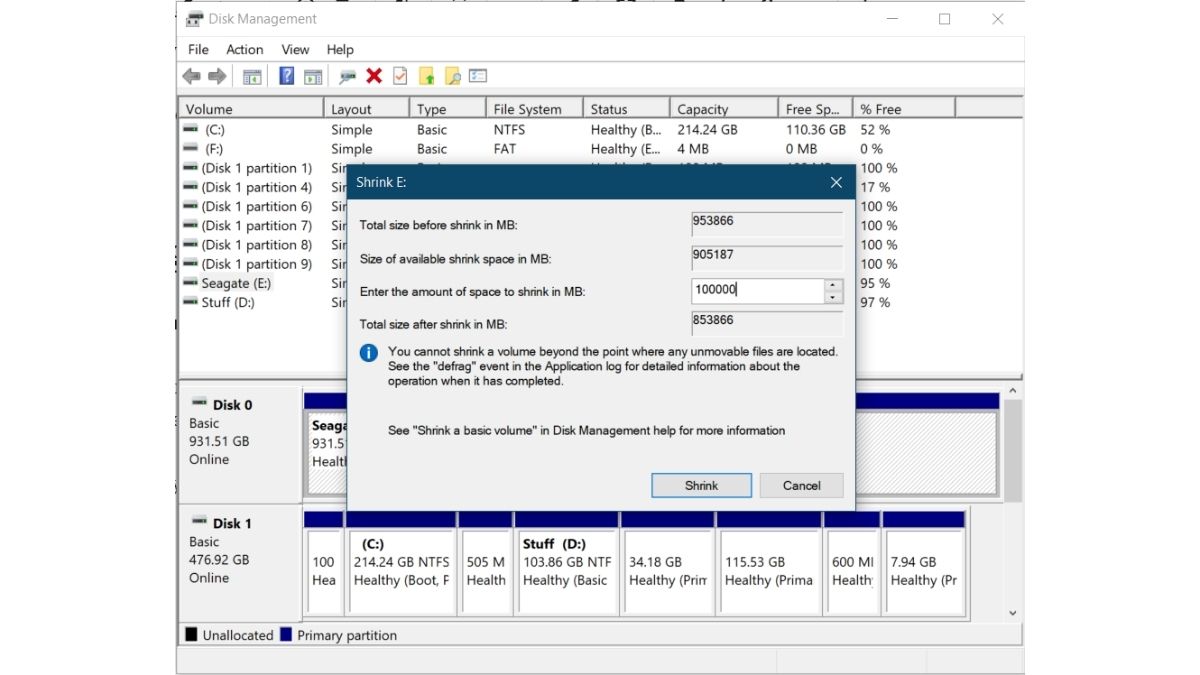
3. Right-click on your drive and click on “Shrink Volume.” Enter the amount of space to be shrunk (in my case, 100GB) and Click on “Shrink.” This will create an empty partition on the Drive. You will now see an “Unallocated” partition.
4. Now Plug in the USB drive you flashed Mint on, restart your computer, and before your manufacturer’s logo appears, keep pressing F2, F5, F8, F10, or F12 to enter into the BIOS. The key to enter into BIOS is OEM specific so, try out the other keys if one doesn’t work. In my case (for Lenovo), it’s F2.
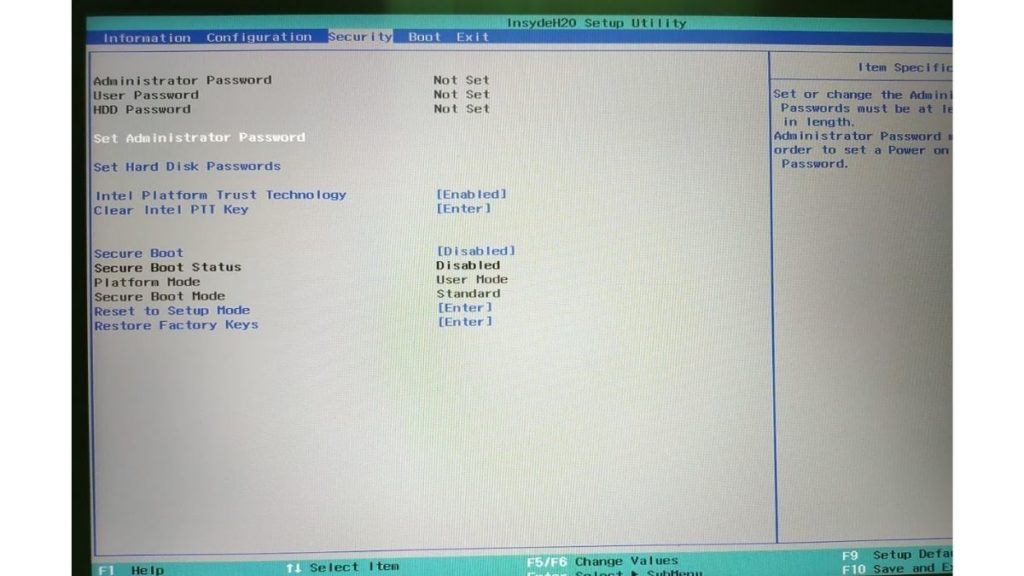
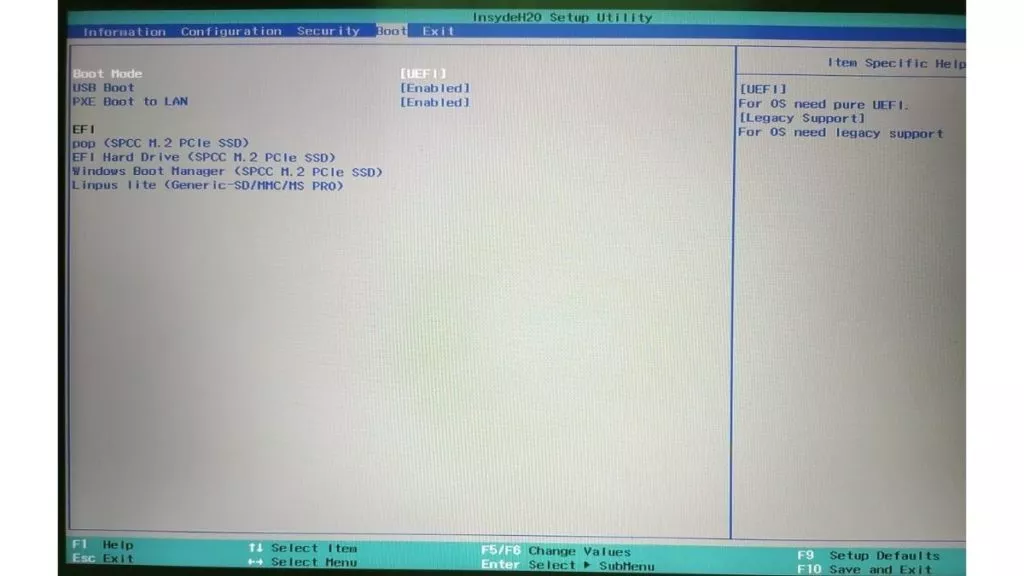
5. Under security, make sure secure boot is disabled. Under boot options, make sure it’s set to UEFI. Now, not every interface looks like this, but the terms will probably be the same. Save your settings and exit BIOS (Usually, every button’s functions will be visible under the options in the BIOS, as you can see in both the pictures).
Booting and Installing Linux Mint
Here are some of the crucial steps of this tutorial to make sure you don’t miss anything.
- Booting into the Boot menu
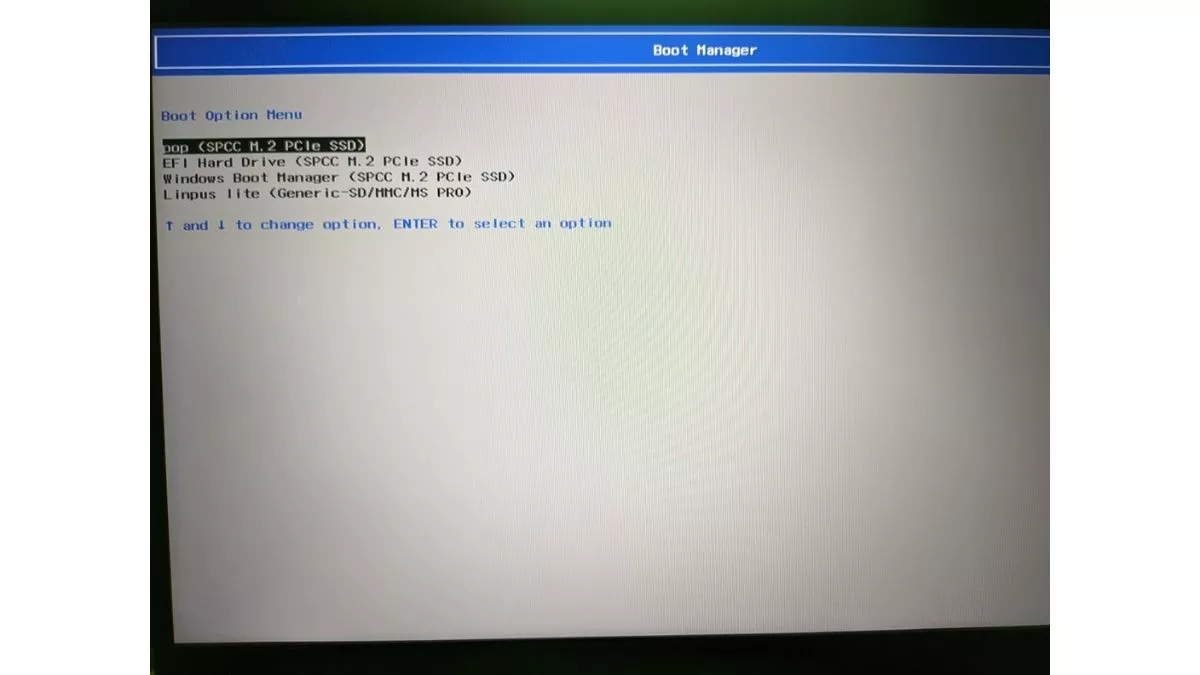
Power on your PC, and before the manufacturer’s logo appears, press the OEM specific key to boot into Boot options. Look up on Google or your PC’s manual about the key or try pressing F2, F5, F8, F10, or F12. The menu will look like this.
- Navigate and press enter
Your USB drive will mostly be displayed at last, as you can see in the above image (Generic -SD/MMC/MS Pro) as I’m using an SD card in an SDHC adapter.
Pressing enter will take you to the Linux Mint desktop. You can try Mint before installing it.
If you don’t like it, I’d suggest you check out our Pop!_OS Review article. The same procedure can be followed to install most of the Linux Distros.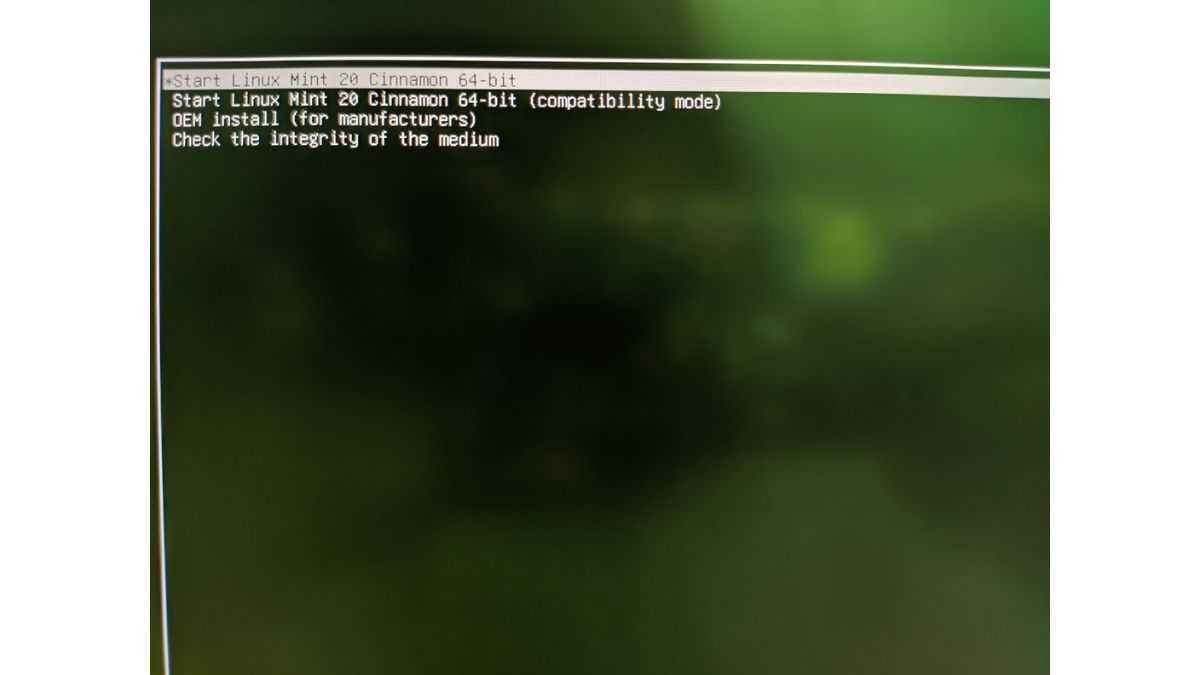
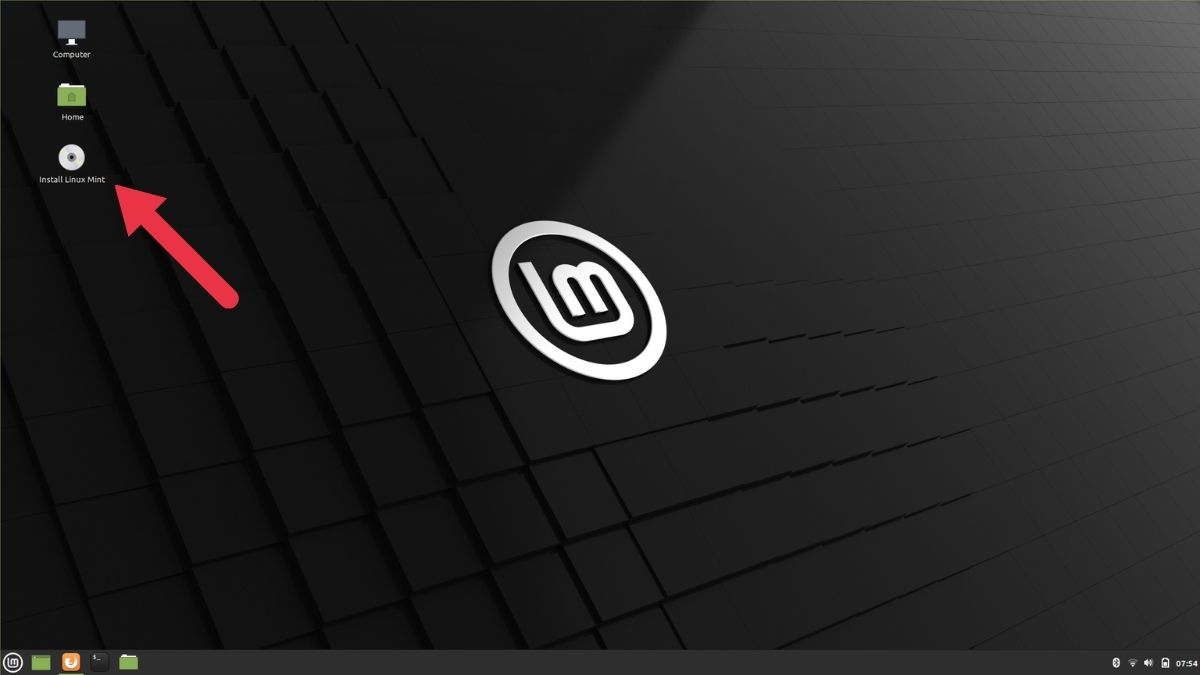
- Open “Install Linux Mint” application.
The “Install Linux Mint Application” can be found on the desktop.
- Set up the language until..
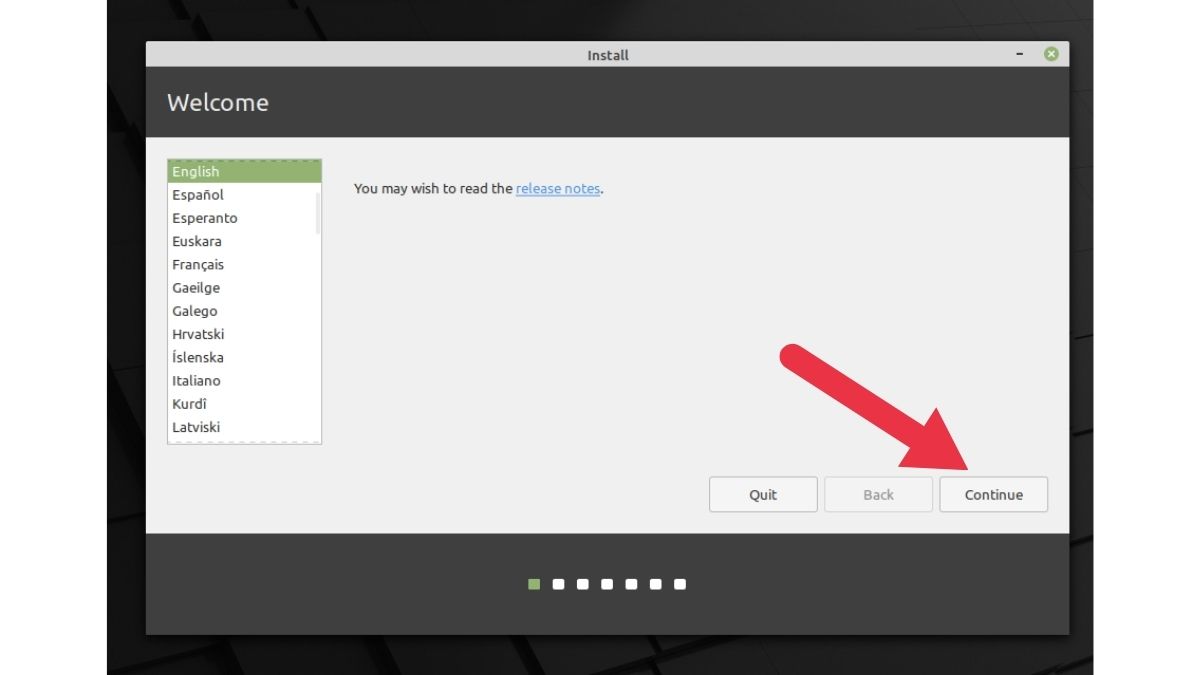
Set up the keyboard and OS language until you reach the “Installation Type” menu.
- Select “something else”
Select the “Something else” option and continue your installation journey. You can also choose the option “Erase everything and Install Mint” considering you’ve already backed up every file.

- More Partitions!
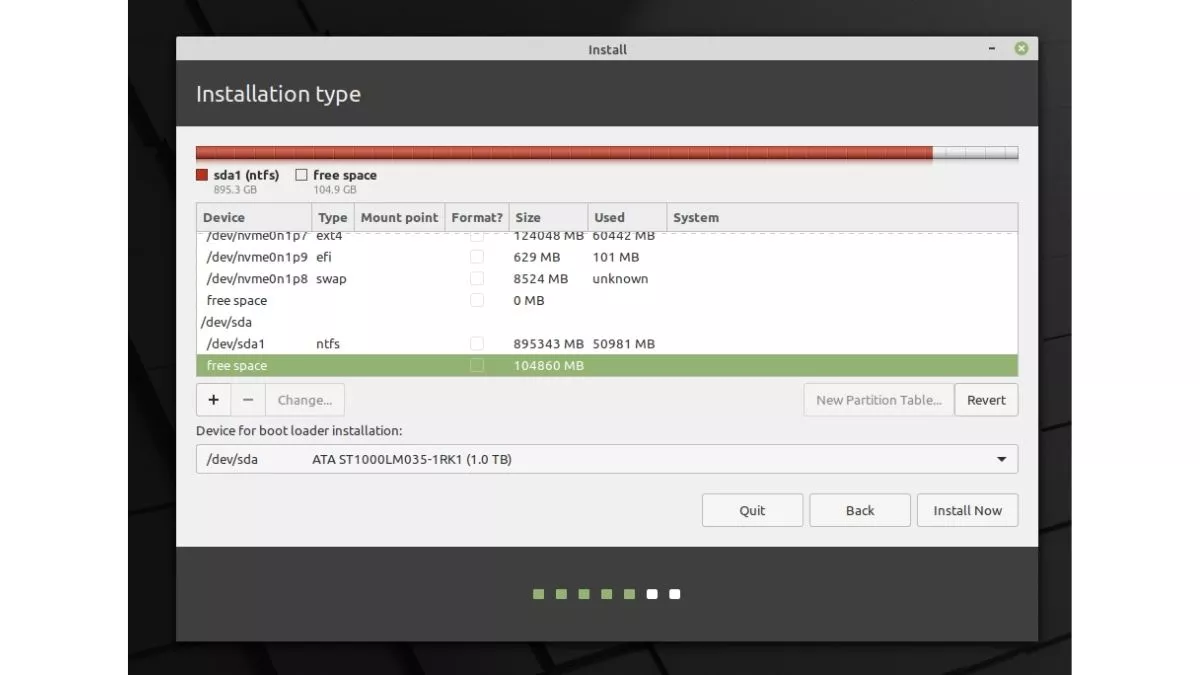
Phew! It’s been a long journey so far; you don’t want to quit after coming this far, do you? Four more steps and Linux Mint will be all yours. Remember the space we freed up for installing Mint while in Windows? In the list of partitions, find a partition labeled “Free Space.” Double-click on it to create new partitions.
- I AM Root!
The Root is the place where essential components of your system are stored. In standard terms, consider it to be the “C:\\ Drive” of Windows.
The least recommended space for root is 30GB (considering we only have 100GB of free space). In the list of Mount points, select “/.” Make sure everything looks exactly the same as in the image.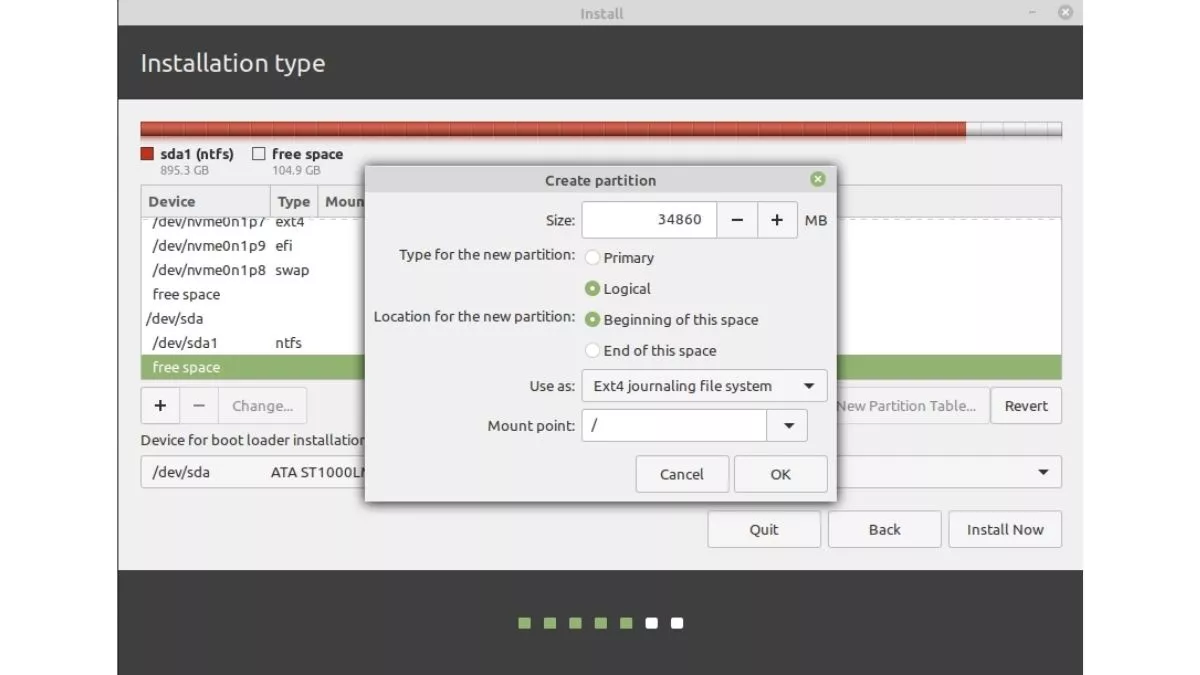
- Home Sweet Home
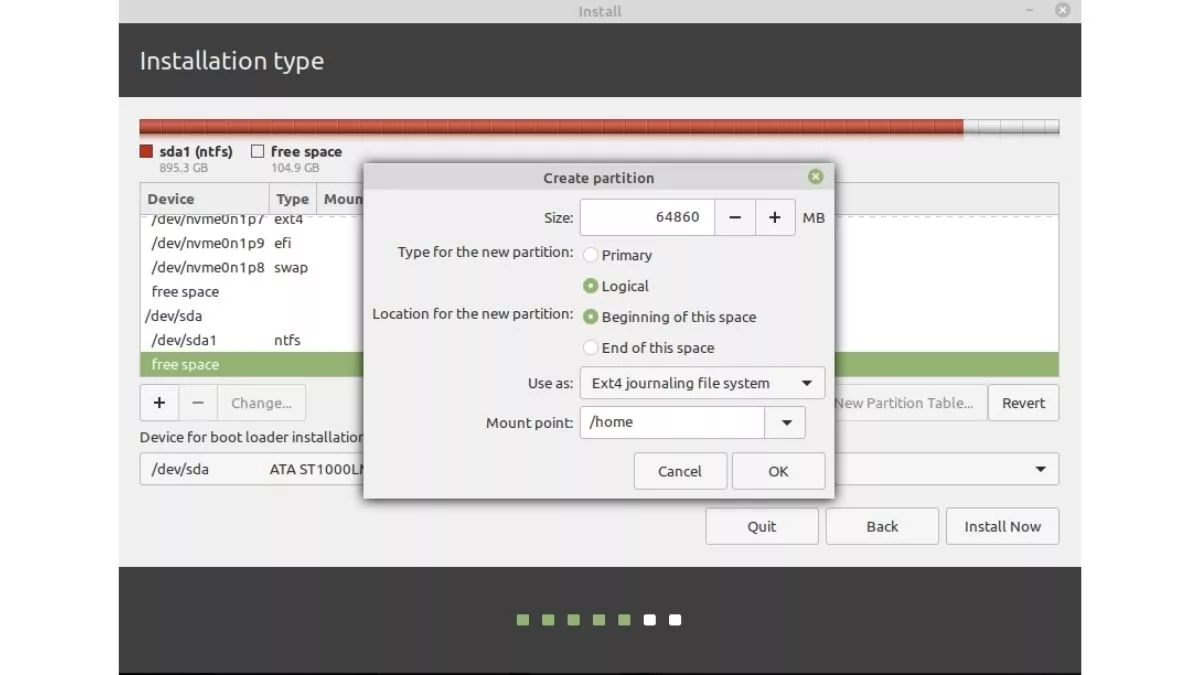
Home is where you’ll store most of your downloaded files and folders. The bare minimum recommended space for the Home partition is, in our case, is 60GB. Make sure to select “/home” from the list of mount points.
- Swap? Meh
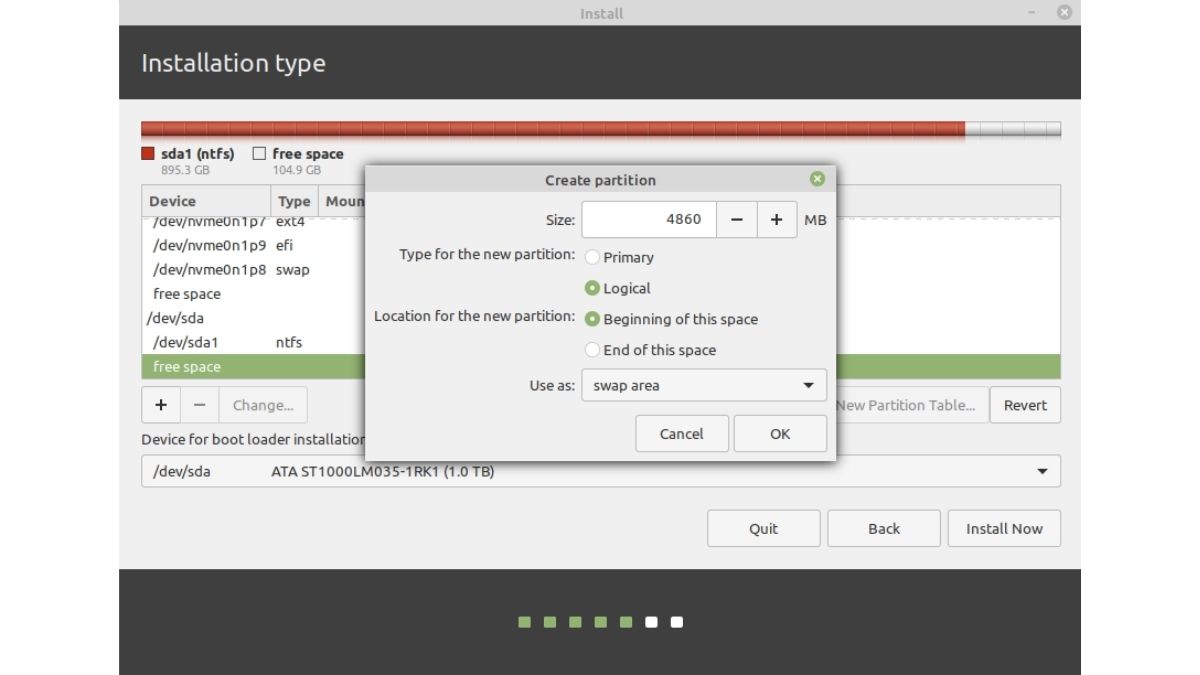
It is necessary to have swap memory if you have less than 2GB of RAM. For starters, the swap memory is used when your RAM runs out of storage, so you can continue working or watching in a new tab that YouTube video your friend recommended in the class even though you have 4-5 Chrome tabs open.
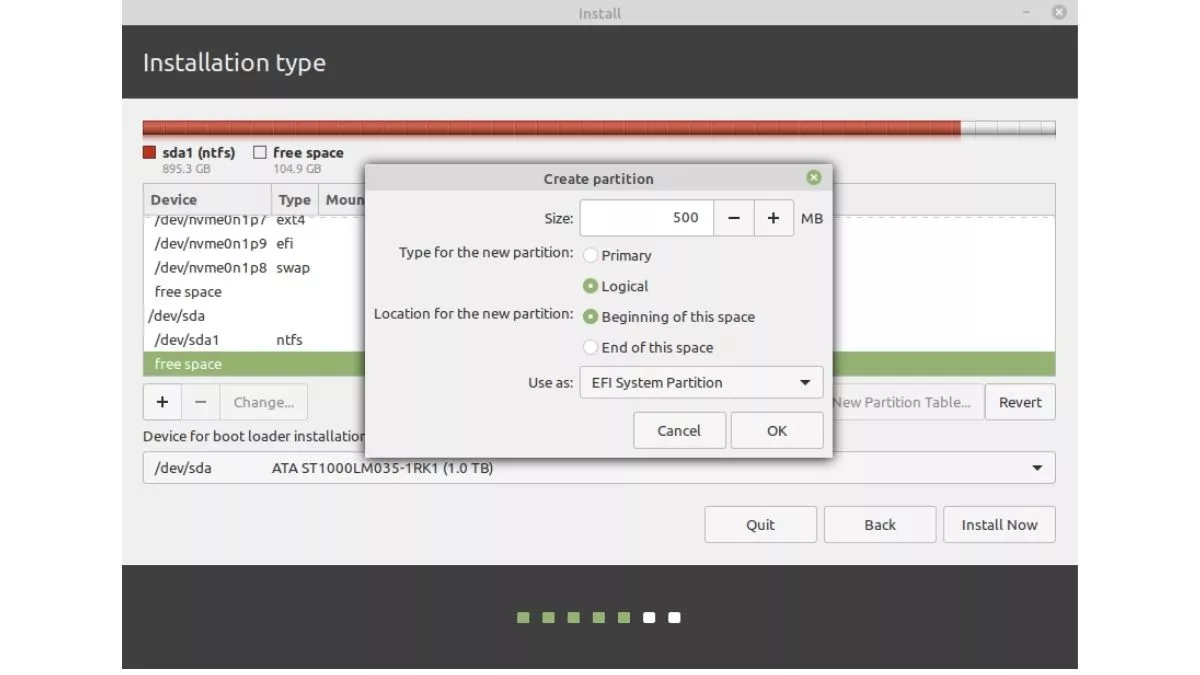
- . Creating an EFI Partition
EFI stores your grub, which helps you choose between booting into Windows or Mint while booting. The minimum recommended space to allocate is 500MB.
- Final Step!
Now that you have created the partitions, make sure you select the Root partition (you’ll know when it’s highlighted) and click on the Install Now button.
The installation may take up to 30 minutes, depending on the speed of your hard drive. Once it’s done, you’ll be asked to reboot, and by the end of it, you will have a dual-booted system with Windows and Linux Mint installed.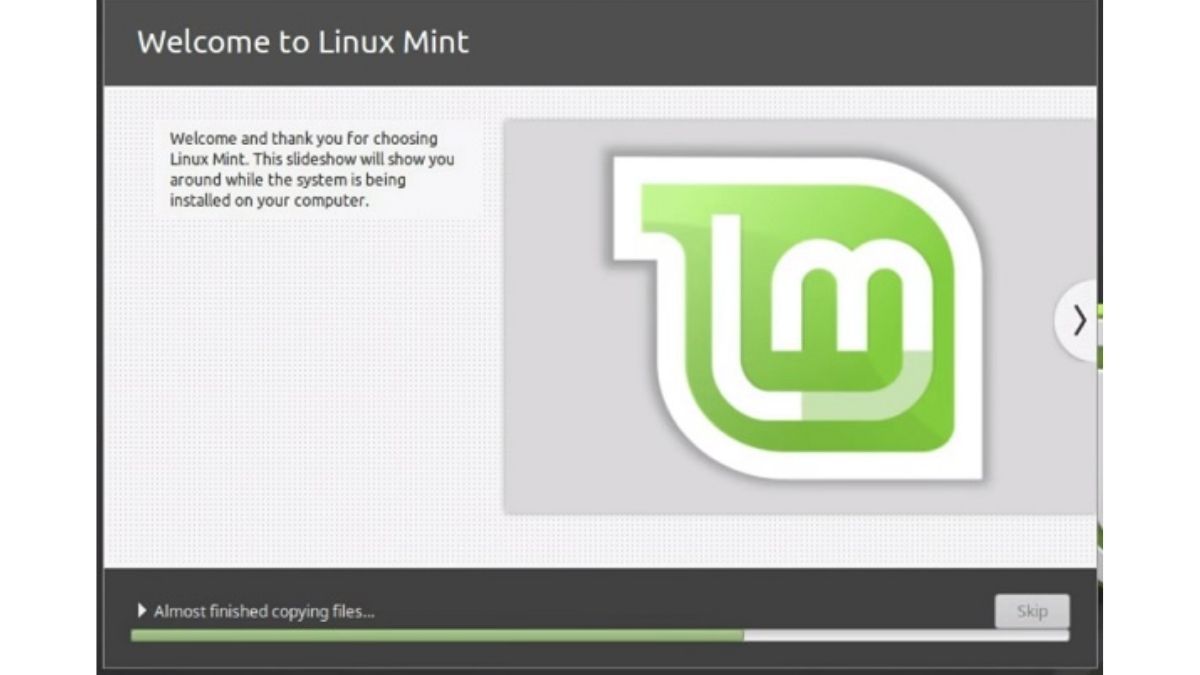
That’s pretty much it in this How to install Linux Mint tutorial. Pat yourself on the back if you made it till here, and for those still stuck in the process, do let us know the issue(s) you’re facing, and we’ll try to help out.
That said, installing most of the Linux distros requires you to follow the same steps except their may be visual UI changes here and there, but most of the time, the process will be the same. Do hit us up if you have any suggestions.
The post How to Dual-Boot Linux Mint 20.1 Alongside Windows 10? appeared first on Fossbytes.
from Fossbytes https://ift.tt/3v8e9yT
via IFTTT


0 comments:
Post a Comment