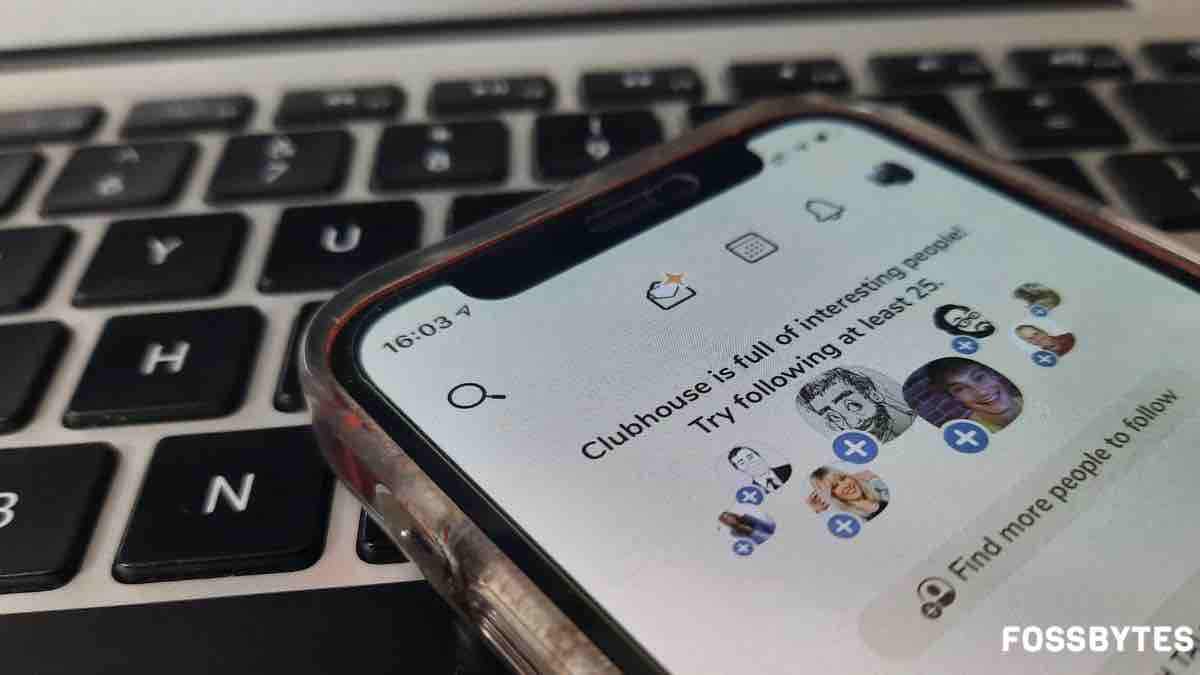
So you’ve managed to get your hands on a Clubhouse invite and now want to get started with the app. After you’ve signed up for the app, you can personalize your interests and get connected with like-minded people. The Clubhouse app asks for permissions like contacts and microphones.
Once you’re past that, you can personalize the app for tailored suggestions. Here’s how to set interests and get started with the Clubhouse app.
Getting Started With Clubhouse App
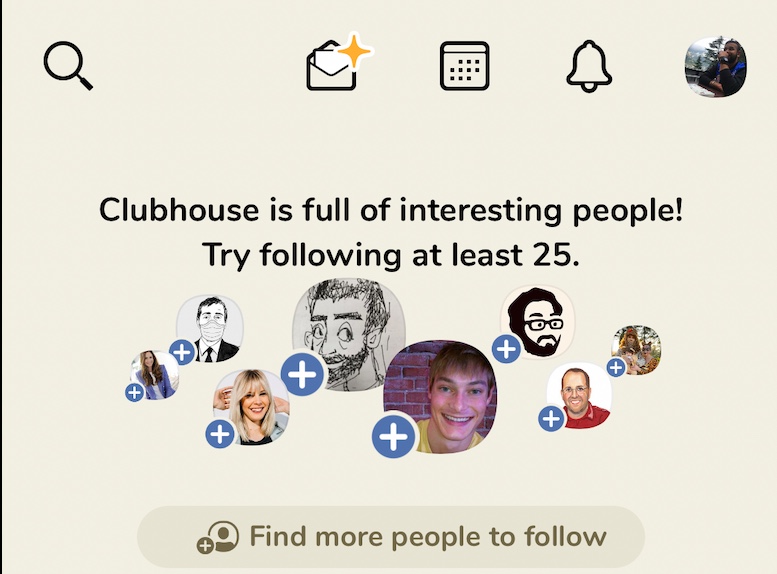
When you sign up with an invite, follow the on-screen instructions, and you’ll reach the app’s home screen. All the major controls are at the top of the screen. Here are the basic Clubhouse controls to give you a quick idea of all the features.
Clubhouse Home Screen Layout
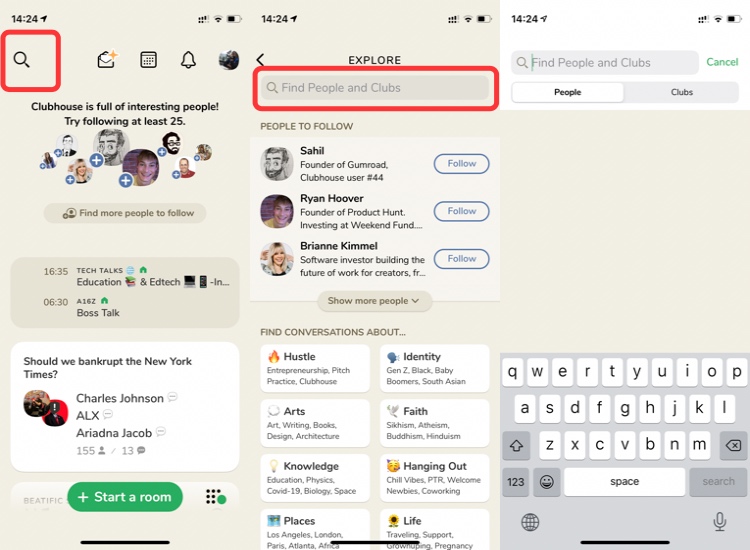
You can search for people and topics using the magnifying glass. Tap on it and type in the names of people or clubs you want to find. You can also scroll through the names in suggestions and follow the people and topics you like.
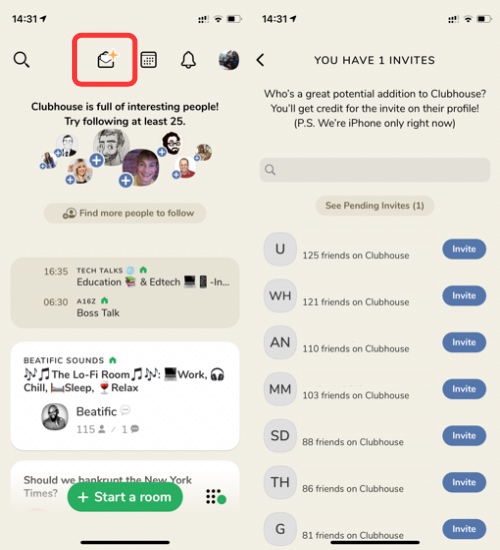
There’s an Envelope icon next to the search button that lets you invite more friends. Be mindful that you get only two invites, and the app is an iOS exclusive at the time of writing this. Also, when someone joins via your invite, the app gives you credit on that person’s profile.
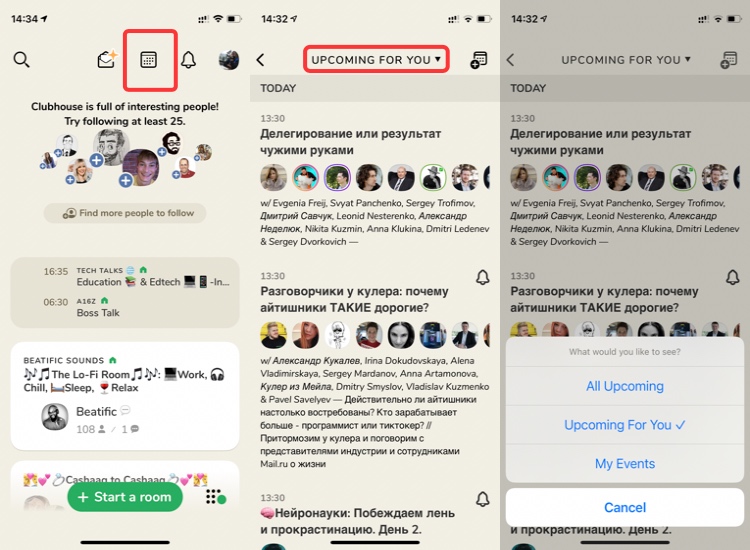
Next up, you have the calendar icon. The calendar on the Clubhouse app is simple and easy to use. You can toggle between All upcoming, upcoming for you, and My events by tapping the button on the top. The Upcoming for you tab shows events related to your interests on the app. In the All upcoming section, you’ll see all the rooms that are about to start. The My Events section shows upcoming events set up by you or the rooms where you’re taking part.
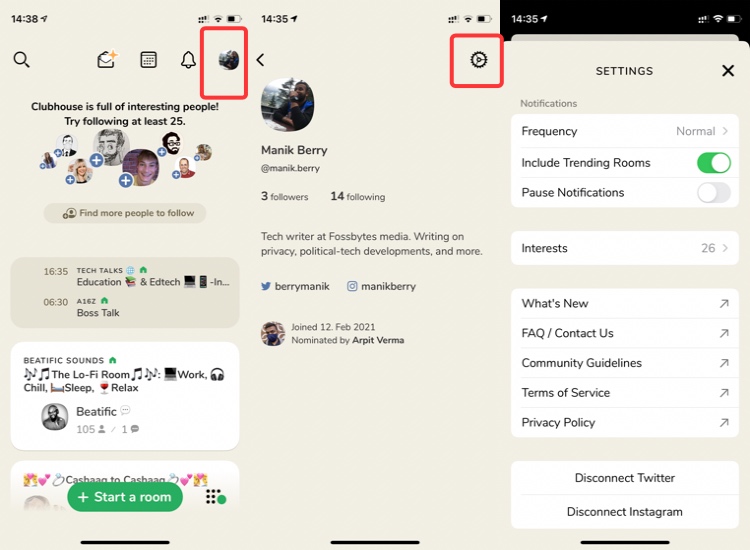
Then you get to the bell icon, which is where you can check your notifications and updates. Lastly, you have your profile button, where you can check your followers, update your bio, add your Instagram and Twitter handles, and toggle the app settings.
Pro Tip: Once you’re in your profile, get to the app settings by tapping the Gear icon on the top-right corner. Here, you can control the frequency of your notifications and update your interests to get better room recommendations.
How To Start A Clubhouse Room
This is where Clubhouse gets interesting. Once you’ve familiarized yourself with the app, you can start your own event or room. You can either schedule a room on Clubhouse or just start broadcasting and wait for others to join. Here’s how to start a Clubhouse room:
- Schedule A Clubhouse Room
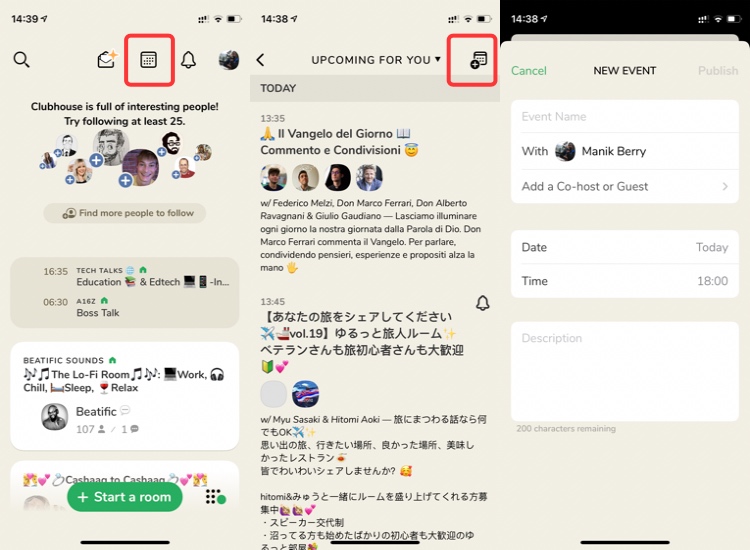
You can schedule a Clubhouse room by tapping on the Calendar icon. From here, tap on the Calendar with a + icon on the top right corner. You can add the details of your room like event name, hosts and co-hosts, and a description of up to 200 characters.
- Start A Room On Clubhouse
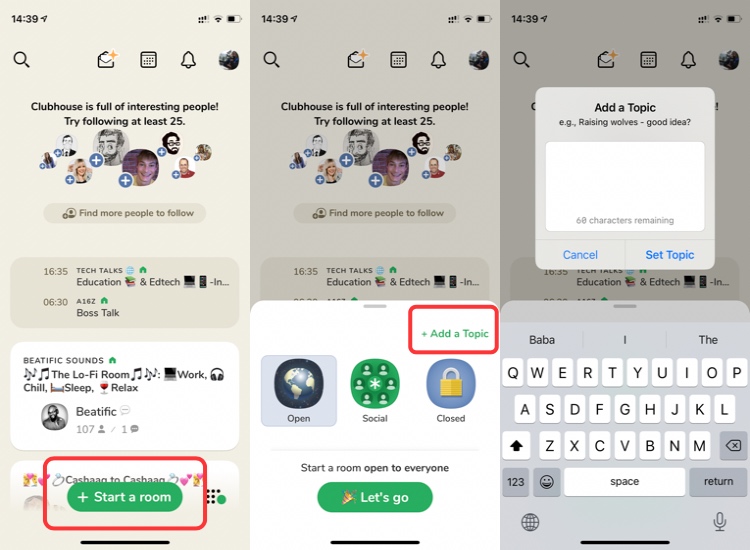
If you just want to start an event and wait for others to join, tap on the “Start a room” button at the bottom of the screen. You can create an open room for anyone to join, a social room where only your followers can join, or a closed room where only the people you invite can join.
Getting Started With Clubhouse: Rounding Up
So these are the basics you need to know to get started with Clubhouse. Once you start using the app, you’ll be able to filter your interests, contribute to other rooms and create better rooms. The audio-only nature makes a conversation more meaningful and contextually relevant.
I’ve been using Clubhouse for a while, and there are plenty of things that need improvement. For instance, in a big room with multiple speakers, at times, it is difficult to find out who’s talking. There are also audio quality issues, but those depend on the speaker’s microphone. Rest assured, it is an interactive experience and lets you actively participate in a discussion.
The post How To Get Started With Clubhouse And Create A Clubhouse Room appeared first on Fossbytes.
from Fossbytes https://ift.tt/3sIP9fB
via IFTTT


0 comments:
Post a Comment